Introduction
Do you have a strong desire to educate people about your ideas, information, or original thinking? Look no further than Blogger.com, the ideal website on which to launch your personal blog. Blogger.com features a user-friendly and intuitive interface that makes it simple to create and post interesting content, regardless of whether you're an aspiring writer, an experienced expert in your industry, or simply want to document your personal journey. With its extensive library of editable templates and potent features, you can let your imagination run wild and create a distinctive online presence. Why then wait? Start blogging today with Blogger.com and let the world hear your voice.Step1: Create a Google Account
Step5: Create Your First Blog Post
Step6: Optimize Your Blog for Search Engines
Step7: Connect Your Blog to Google Analytics
Start a Blog on Blogger.com
Step 1: Create a Google Account
1. Go to [Google's homepage](https://www.google.com).
2. Click on 'Sign In' at the top right corner of the page.
3. Click on 'Create account'.
4. Fill in the required details and click 'Next'.
5. Follow the on-screen instructions to complete the account creation Process.
Step 2: Sign in to Blogger
1. Go to [Blogger.com](https://www.blogger.com).
2. Click on 'Sign In' at the top right corner of the page.
3. Enter the Google account credentials you created in Step
1.
Step 3: Create a New Blog
1. After signing in, click on 'Create New Blog'.
2. In the dialog box that appears, enter a title for your
blog.
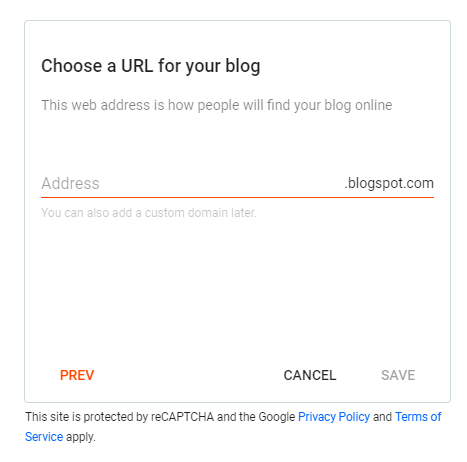
3. Choose a blog address (URL) that isn't already in use.
4. Choose a template for your blog. (You can change this
later.)
5. Click on 'Create blog!'.
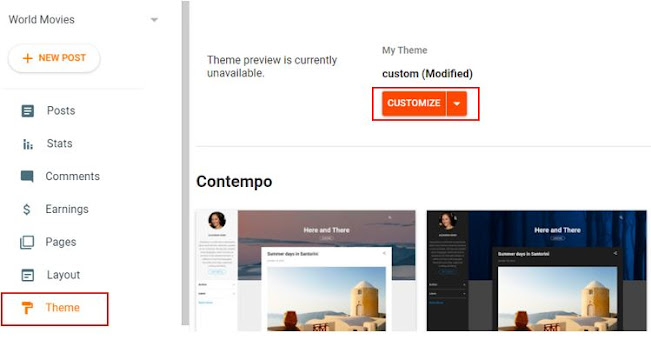
1. On your Blogger dashboard, click on 'Theme'.
2. Browse through the available themes and click on one that
you like.
3. Click on 'Apply' to change your blog's look.
4. Click on 'Customize' to further tweak your blog's
appearance.
Step 5: Create Your First Blog Post
1. From your Blogger dashboard, click on 'New Post'.
2. Enter a title for your blog post in the 'Post title'
field.
3. Write your content in the 'Post' field.
4. You can format your text, add links, images, videos, etc.,
using the options in the toolbar.
5. When you're done, click on 'Publish'.
Step 6: Optimize Your Blog for Search Engines
To increase the visibility of your blog, it is crucial to make it search engine friendly.1. From your Blogger dashboard, click on 'Settings'.
2. In the 'Basic' section, fill in the 'Description'
field with a short description of what your blog is about.
3. In the 'Search preferences' section, fill in the 'Meta tags
description'. This description will appear in search engine results.
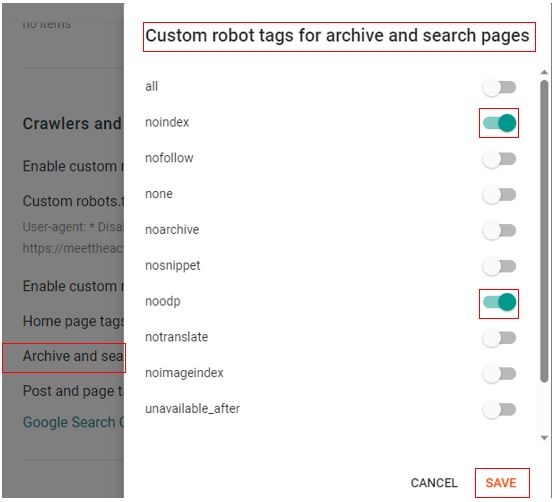
4. Also in 'Search preferences', enable 'Custom robots header tags'
and select 'All' for home page tags.
Step 7: Connect Your Blog to Google Analytics
Google Analytics is a tool that provides insights into your blog's traffic.1. Create a new account on [Google Analytics](https://analytics.google.com/).
2. Get your 'Tracking ID' (it starts with 'UA-').
3. Go back to your Blogger dashboard, click on 'Settings',
then 'Other'.
4. Scroll down to 'Google Analytics' and paste your Tracking
ID in the 'Analytics Web Property ID' field.
Step 8: Make Your Blog Public
To make your blog accessible to everyone on the internet
1. From your Blogger dashboard, click on 'Settings'.
2. In the 'Basic' section, under 'Blog Readers', select
'Public'.
And there you have it! With these steps, you should be well
on your way to setting up and starting a successful blog on Blogger.com. Happy
blogging! You
can now set the Google Console


Your comments are greatly valued, and we appreciate your participation.